Unlock the Power of Automated Payouts with eddy's Self-Billing and Mass Payment features
Self-billing generates invoices on your payees' behalf, so you stop chasing artists for paperwork built from data you already hold. Paired with a payout method, it also pays them in bulk without leaving eddy.app.
This guide covers the one-time setup: your invoicing rules, your payout methods, and getting your payees validated. By the end, eddy.app produces documents on its own when you publish statements.
📋 Before you start
You need at least one processed and published statement. If you're not there yet, start with Statements - Starting Guide.
Step 1: Configure Invoicing and Payout Methods
Threshold
Set a minimum amount. eddy.app only generates a document once a payee's total unpaid balance across all their statements reaches it. Each payee gets their own document, so their balance stays readable.
Self-billing mode
Choose when documents get created:
Automatic: eddy.app creates them as soon as you publish a statement.
Manual: nothing happens on publish. You trigger it yourself with Invoice all or specific invoices on the Published statements page.
In both modes you can also generate documents for every eligible payee at once from the Invoices page, using Generate invoices.
Either way, eddy.app only generates a document once the threshold is met and the payee has authorized self-billing.
Payee exclusions
Exclude specific payees from automatic generation.
Document types
Self-billing produces two types of document: invoices and debit notes. Set your default, then assign the other type to specific payees whose tax situation or territory needs it.
Both types follow the same lifecycle, and each has its own numbering sequence.
🧾 There's no draft stage and nothing to finalize
Documents are created as Pro Forma and finalize on their own when you pay them. Pro Forma is a document status, not a type: an invoice stays an invoice and a debit note stays a debit note. See Document and Payment Statuses.
Tax Residence Certificate
Tax rules can require withholding tax when you pay payees based in another country. A Tax Residence Certificate, issued by the payee's tax authority, is what lets you pay them without withholding tax or at a reduced rate.
Turn this option on to require a certificate before self-billing a foreign payee:
Payees in your company's country aren't affected.
Every other payee, including payees with no country set, needs a certificate. They can't be invoiced or paid until you approve it, or until you decide to continue without one.
It's off by default and applies straight away to existing payees. Foreign payees drop to Partially complete until their certificate is settled.
If you turn it off, self-billing works as before. Statuses and uploaded certificates are kept.
eddy.app doesn't email your payees when you turn it on
Select the payees concerned in
Statements>Payeesand click Send self-billing setup to selected so they know to upload their certificate.
Step 2: Set your numbering
Under Internal Sequence Numbering:
Set a numbering stem and any placeholders you want in the number.
Set the next number to use.
Decide whether the sequence resets annually.
Invoices and debit notes run on separate sequences, so a payee on debit notes never consumes an invoice number.
🧾 Numbers are assigned at payment, not at creation
A Pro Forma has no number. eddy.app assigns the next number in the sequence only when you pay the document and it finalizes. Your numbers therefore follow the order you pay in, not the order you created in.
Step 3: Choose your payout methods
Activate one or more. Most labels run Wise plus Self-Managed as a fallback.
Method | How it works |
|---|---|
Self-Managed | You generate documents in eddy.app and pay however you like. No payment details are collected. Activate it as a fallback for territories the other methods don't cover. |
Wise (recommended) | Bulk payments and real-time status updates that sync back onto your statements and documents. |
Manual Bank Transfer | Payees give you their bank details in eddy.app; you pay through your own bank. To require BIC/SWIFT, click the cog icon and save.
|
PayPal | eddy.app builds a Mass Payouts file that you import into PayPal. |
.png)
⚠️ Deactivating a method affects payees already using it
Their setup drops to Partially complete, new invoicing pauses for them, and they see a warning in their portal until they pick a new method.
Set-up Wise
Wise setup now has its own guide: Set Up the Wise Integration.
Step 4: Activate self-billing
Once at least one payout method is active, turn Self-Billing on.
This opens the feature to your payees so they can enter their details, and lets statements inherit payment statuses from their invoices or debit notes.
Step 5: Invite your payees
Payees can't be invoiced until they've validated their details and authorized self-billing. Invoices are then generated for any unpaid statements.
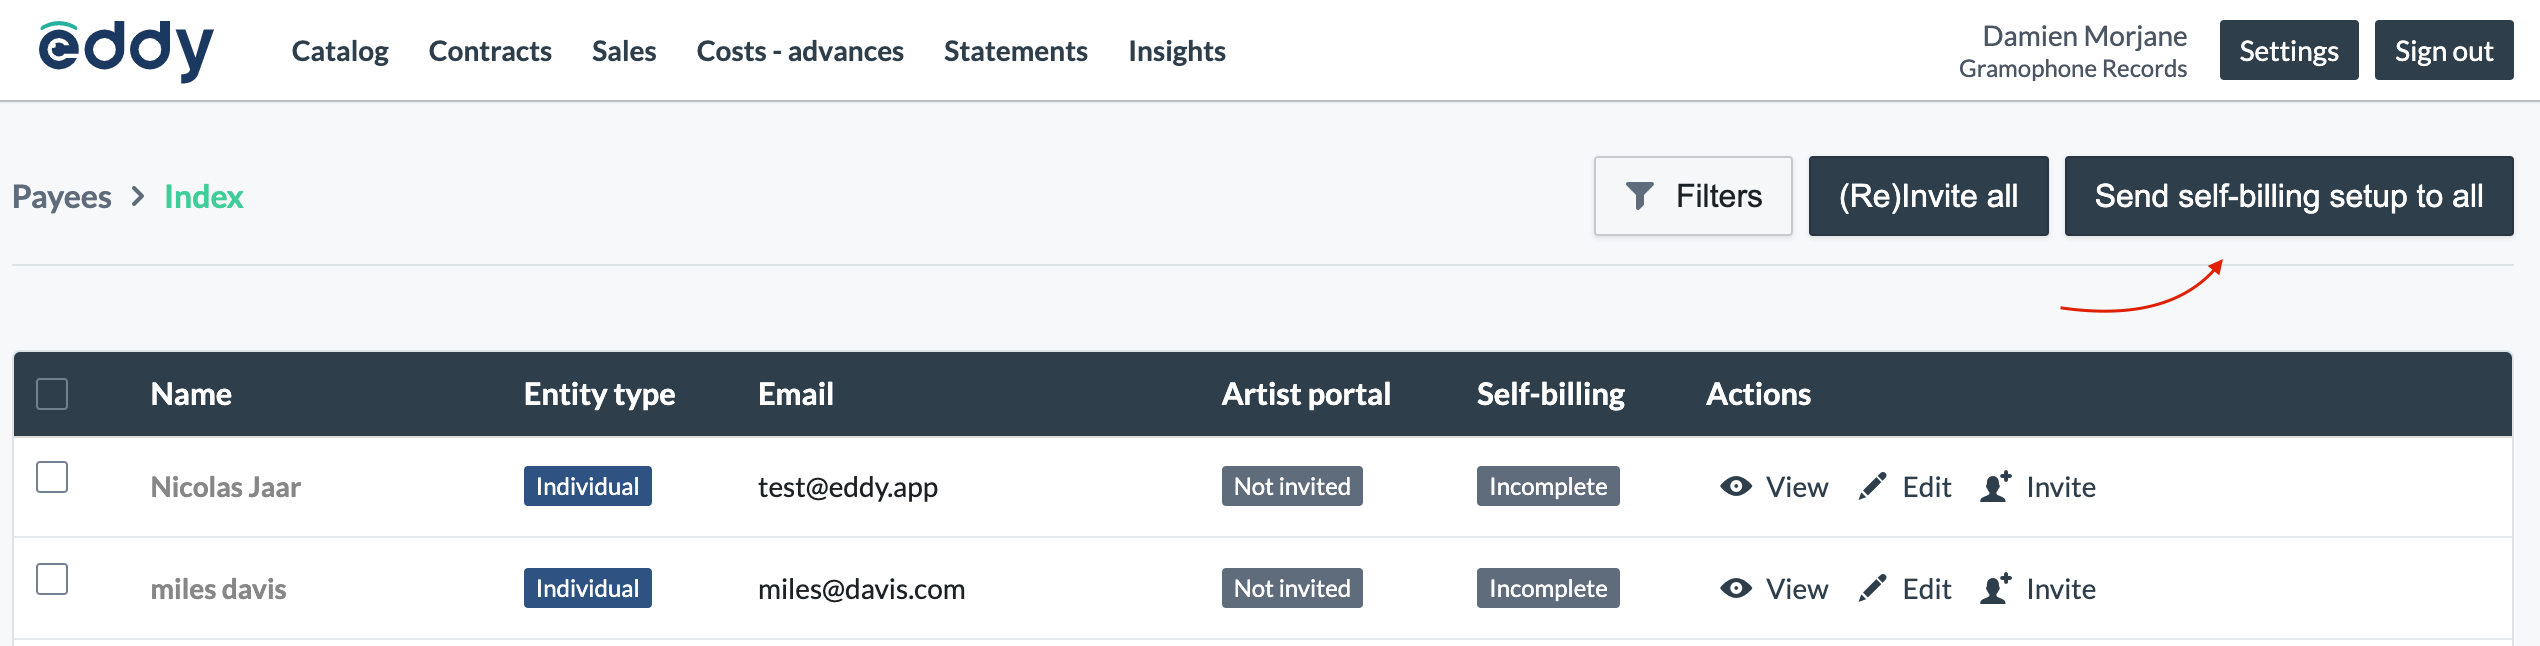
Go to
Statements>Payees.Click Send self-billing setup to all, or invite specific payees using the Actions buttons.
Each payee gets an email pointing them to their portal to fill in their billing and payment details.
To change the wording of that email, see Personalize Outbound Emails.
What payees do
In the Payee Portal, each payee enters their legal address, their VAT number if they're registered, and their payment details. They can update these at any time.
The primary user on the account must then click Authorize self-billing. Nothing is generated for them until they do.
Payees registered for VAT can only authorize once their VAT number is verified. If verification is still running, the button stays unavailable for a moment.
If you require a Tax Residence Certificate, payees based in another country also upload it in the Tax details section of their portal. They can authorize self-billing without waiting for you to review it.
For the payee's view of this, see Self-Billing Setup for Payees.
Review Tax Residence Certificates
You get an email each time a certificate is uploaded, by the payee or by your team. Open the payee's details, go to Tax details, check the document, then click Approve or Reject.
Status | What it means | Can be invoiced and paid |
|---|---|---|
| No certificate yet, or the last one was rejected or deleted. | No |
| A certificate was uploaded and is waiting for your review. | No |
| You checked the certificate and accepted it. | Yes |
| You chose to continue without a certificate. | Yes |
Approve: the status becomes Approved. If the certificate was the last thing missing, the payee's setup becomes Complete and documents are generated according to your self-billing mode. The payee doesn't need to sign again.
Reject: write the reason. The status goes back to Missing and the payee gets an email with your reason, asking them to upload a new certificate.
Upload for the payee: you can upload the certificate yourself from the payee's Tax details. It goes through the same review: the status is In review until someone on your team approves it.
Replace: a payee has one certificate at a time. A new upload replaces the current one, even an approved one. The status goes back to In review and invoicing is on hold until you approve it.
Delete: only your team can delete a certificate. The status goes back to Missing, whatever it was, and the payee needs to upload a new one.
Continue without certificate: use it when you decide to pay the payee without a certificate. The status becomes Approved without certificate and self-billing stops waiting for a certificate. A different withholding tax rate may then apply, so set the right tax deductions for this payee in Settings > Tax deductions before you confirm. Tax deductions apply to statements generated after you save them.
ℹ️ The certificate doesn't calculate any tax
Approving a certificate doesn't add or remove a tax deduction. Some countries still apply a reduced rate with a certificate. Which rate applies is needs to be configured in Settings > Tax deductions.
🌍 A certificate is valid for one country
When a payee's country changes, the status is recalculated. A new foreign country sets it back to Missing, even if it was approved. Your own country means no certificate is needed. Changes to the rest of the address don't affect it.
eddy.app doesn't track expiry dates yet. When a certificate needs renewing, delete it or ask the payee to upload the new one.
Setup statuses
Check the Payees page:
Status | What it means |
|---|---|
Complete | Details validated, payment method valid, Tax Residence Certificate approved (when you require one), self-billing authorized. Ready to be invoiced. |
Partially complete | Something is missing or no longer valid: usually the payment method, a method you've since stopped accepting, or a Tax Residence Certificate that's missing or in review. New invoicing pauses and the payee sees a warning in their portal. |
Payees who haven't validated their details or authorized yet aren't eligible for invoicing.
✍️ Changes apply immediately to invoice and debit notes, with one exception
Editing payee details re-checks their setup and refreshes their open unpaid Pro Forma straight away.
The exception is anything covered by the self-billing authorization, such as legal name, address, or VAT status. Those changes only reach the document once the payee signs the new authorization. For Finalized documents, only payment details can be updated, to update details you’ll need to void & replace the document.
eddy.app is an independent platform and integrations with third-party services do not imply affiliation, endorsement, or official partnership.