Self-Billing streamlines the invoicing and payment process. With this feature, your label or distributor can generate invoices on your behalf, eliminating the need for back-and-forth communication to send the correct invoice!
To be eligible for self-billed invoices, you'll need to:
A label that has activated self-billing module in eddy.
Add your billing and payment details
Upload your Tax Residence Certificate, if your label asks for one
Authorize Self-Billing
Follow the steps below to get set up.
Initial Self-Billing Authorization Setup
Complete the self-billing authorization process following an invitation email from your label:
1. Sign Up
Open your invitation email and click the sign-up link to access the Payee Portal. Remember to set a secure password.
2. Add Your Billing and Payment Details
Once signed in, you'll see a notification indicating that your billing and/or payment details need completion.
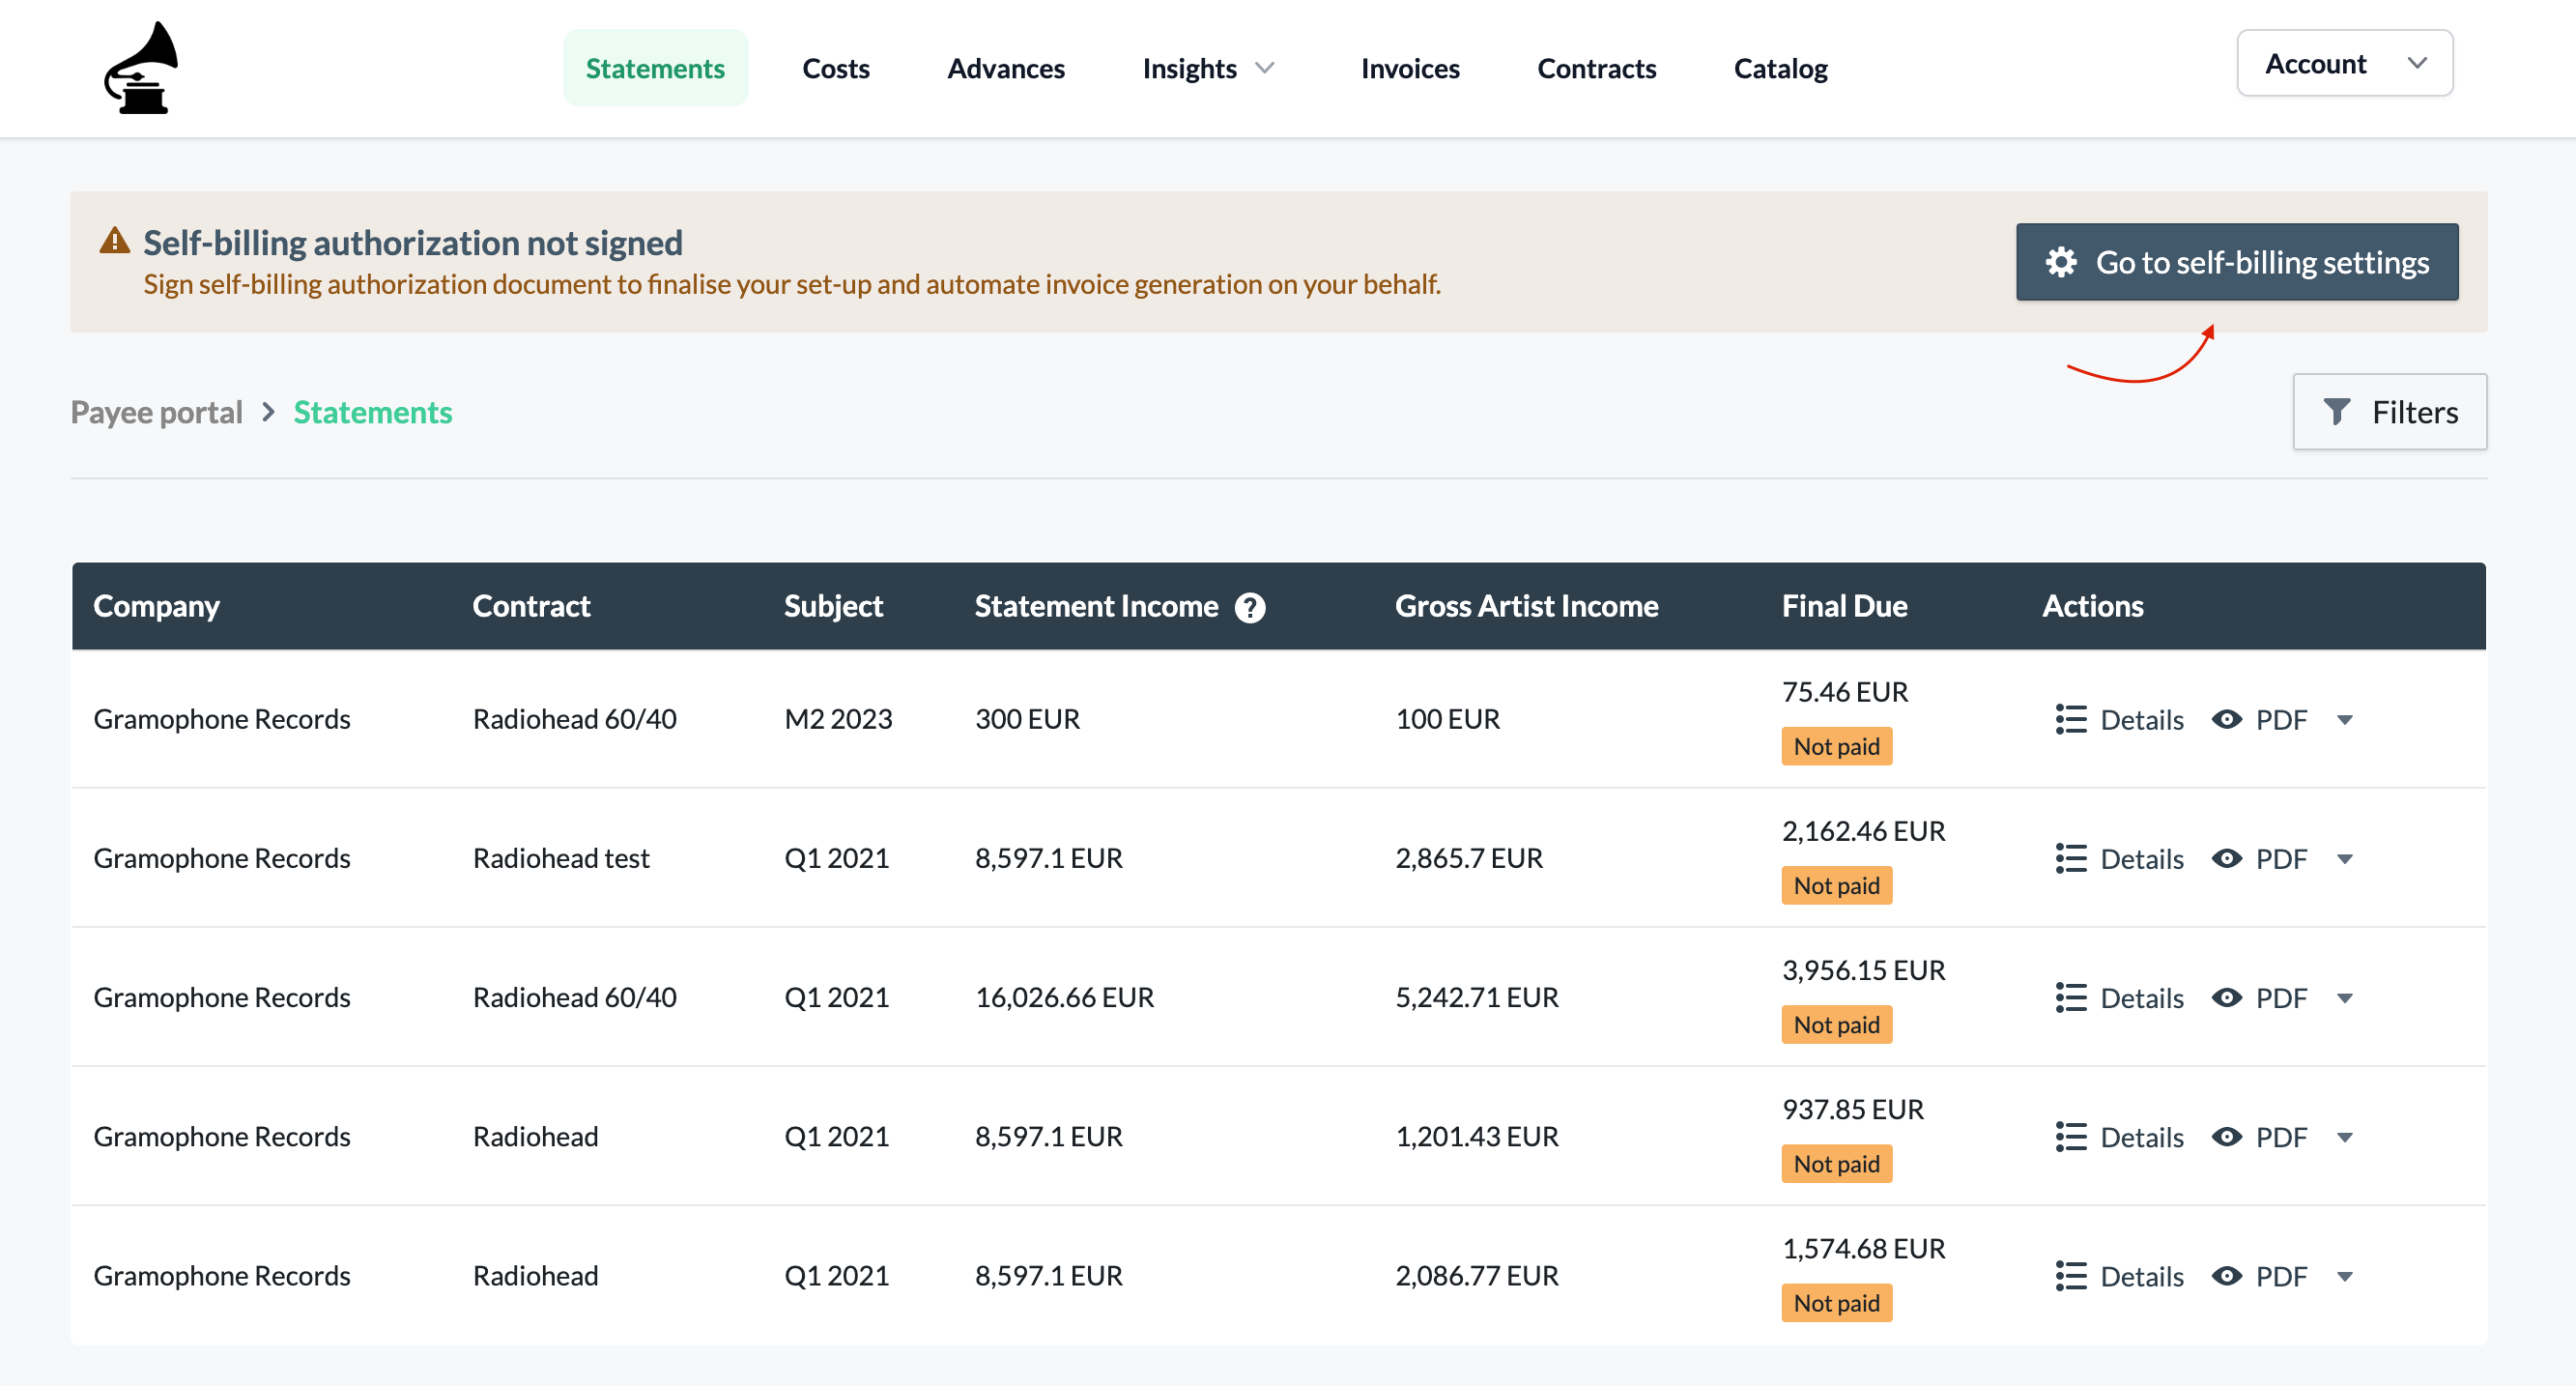
Go to the Self-Billing page in your Settings and fill in all required fields. Extra validations ensure data accuracy.
Start by adding your legal address. We’ll use this to check your eligibility to the available payout methods.
Don’t use PO box
For bank transfers, use your actual address, not a PO box, to comply with bank’s KYC regulations.
If subject to VAT, enable the toggle and add your VAT number with the country code: BE1234567890
Update your details and navigate to payment method tab.
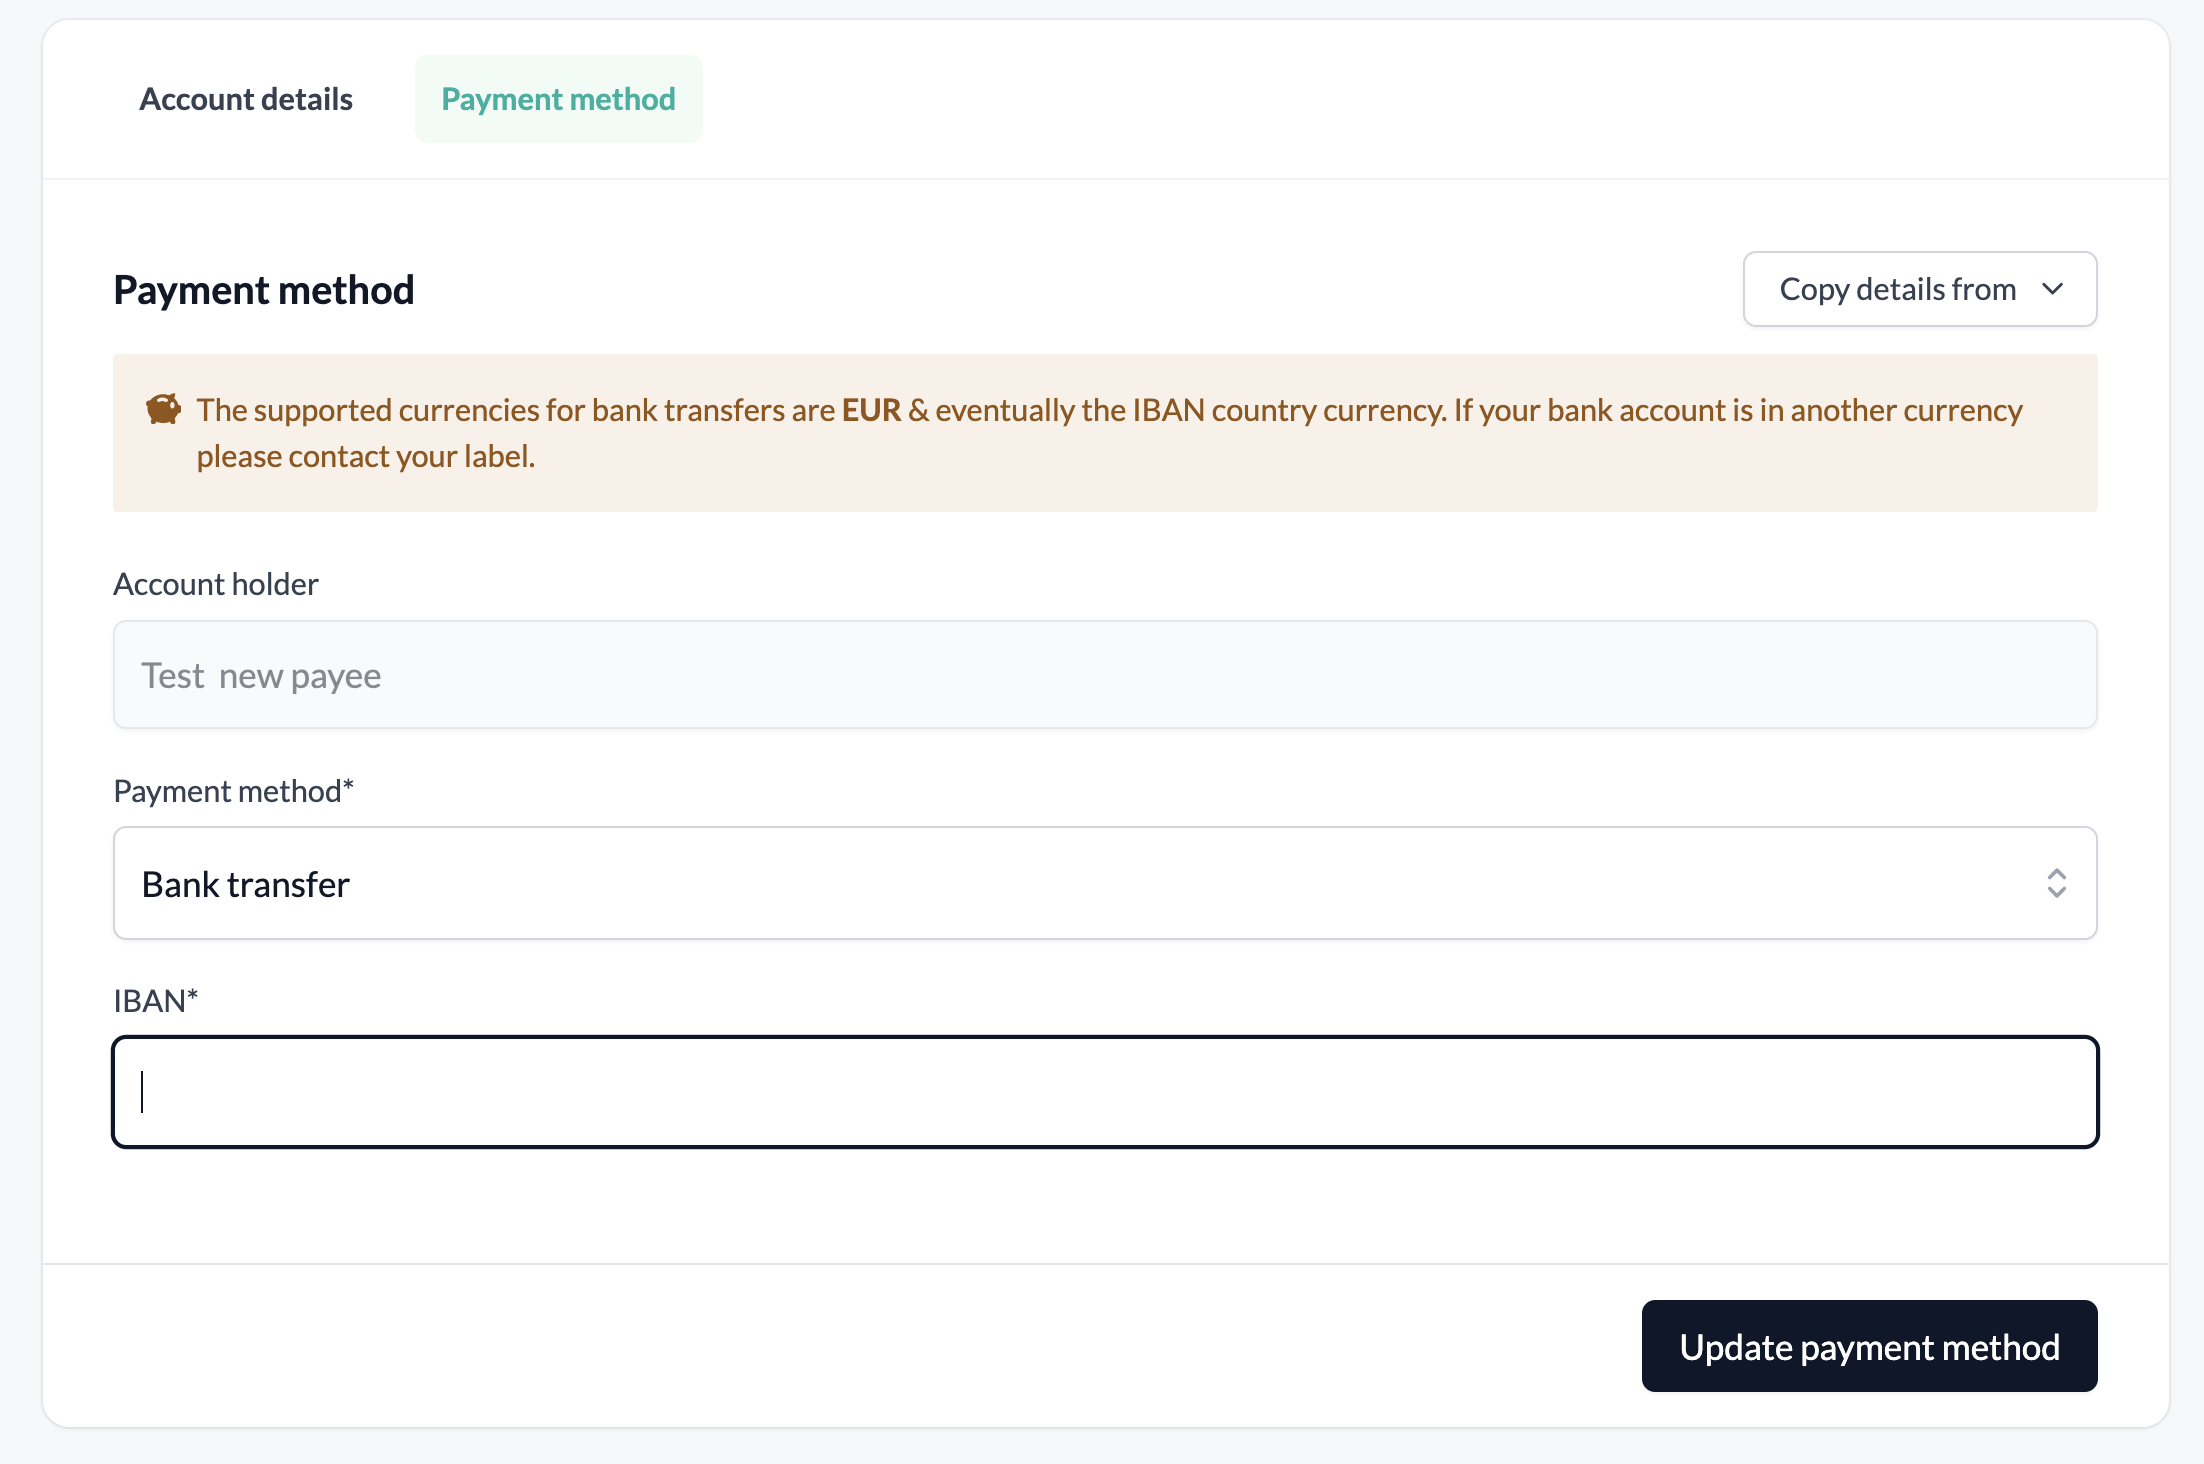
Select the preferred payment method and for bank transfer select the preferred transfer currency. Here is detailed list of available countries and bank transfers.
Fill in your details and click on 'Update payment method' to save.
Privacy
All sensitive data within our database is protected with multiple encryption layers.
3. Upload Your Tax Residence Certificate (if requested)
If you're based in a different country from your label, tax rules may require them to have your Tax Residence Certificate before they pay you. It's issued by your country's tax authority.
If your label asks for one, you'll see it in the Tax details section of your Settings:
Upload the certificate. Its status becomes In review while your label checks it.
Once your label approves it, nothing else is needed from you.
If your label can't approve it, you'll get an email with their reason. Upload a new certificate from the same page.
.png)
Until the certificate is approved, your label can't generate invoices or pay you.
For questions about which document to provide, contact your label.
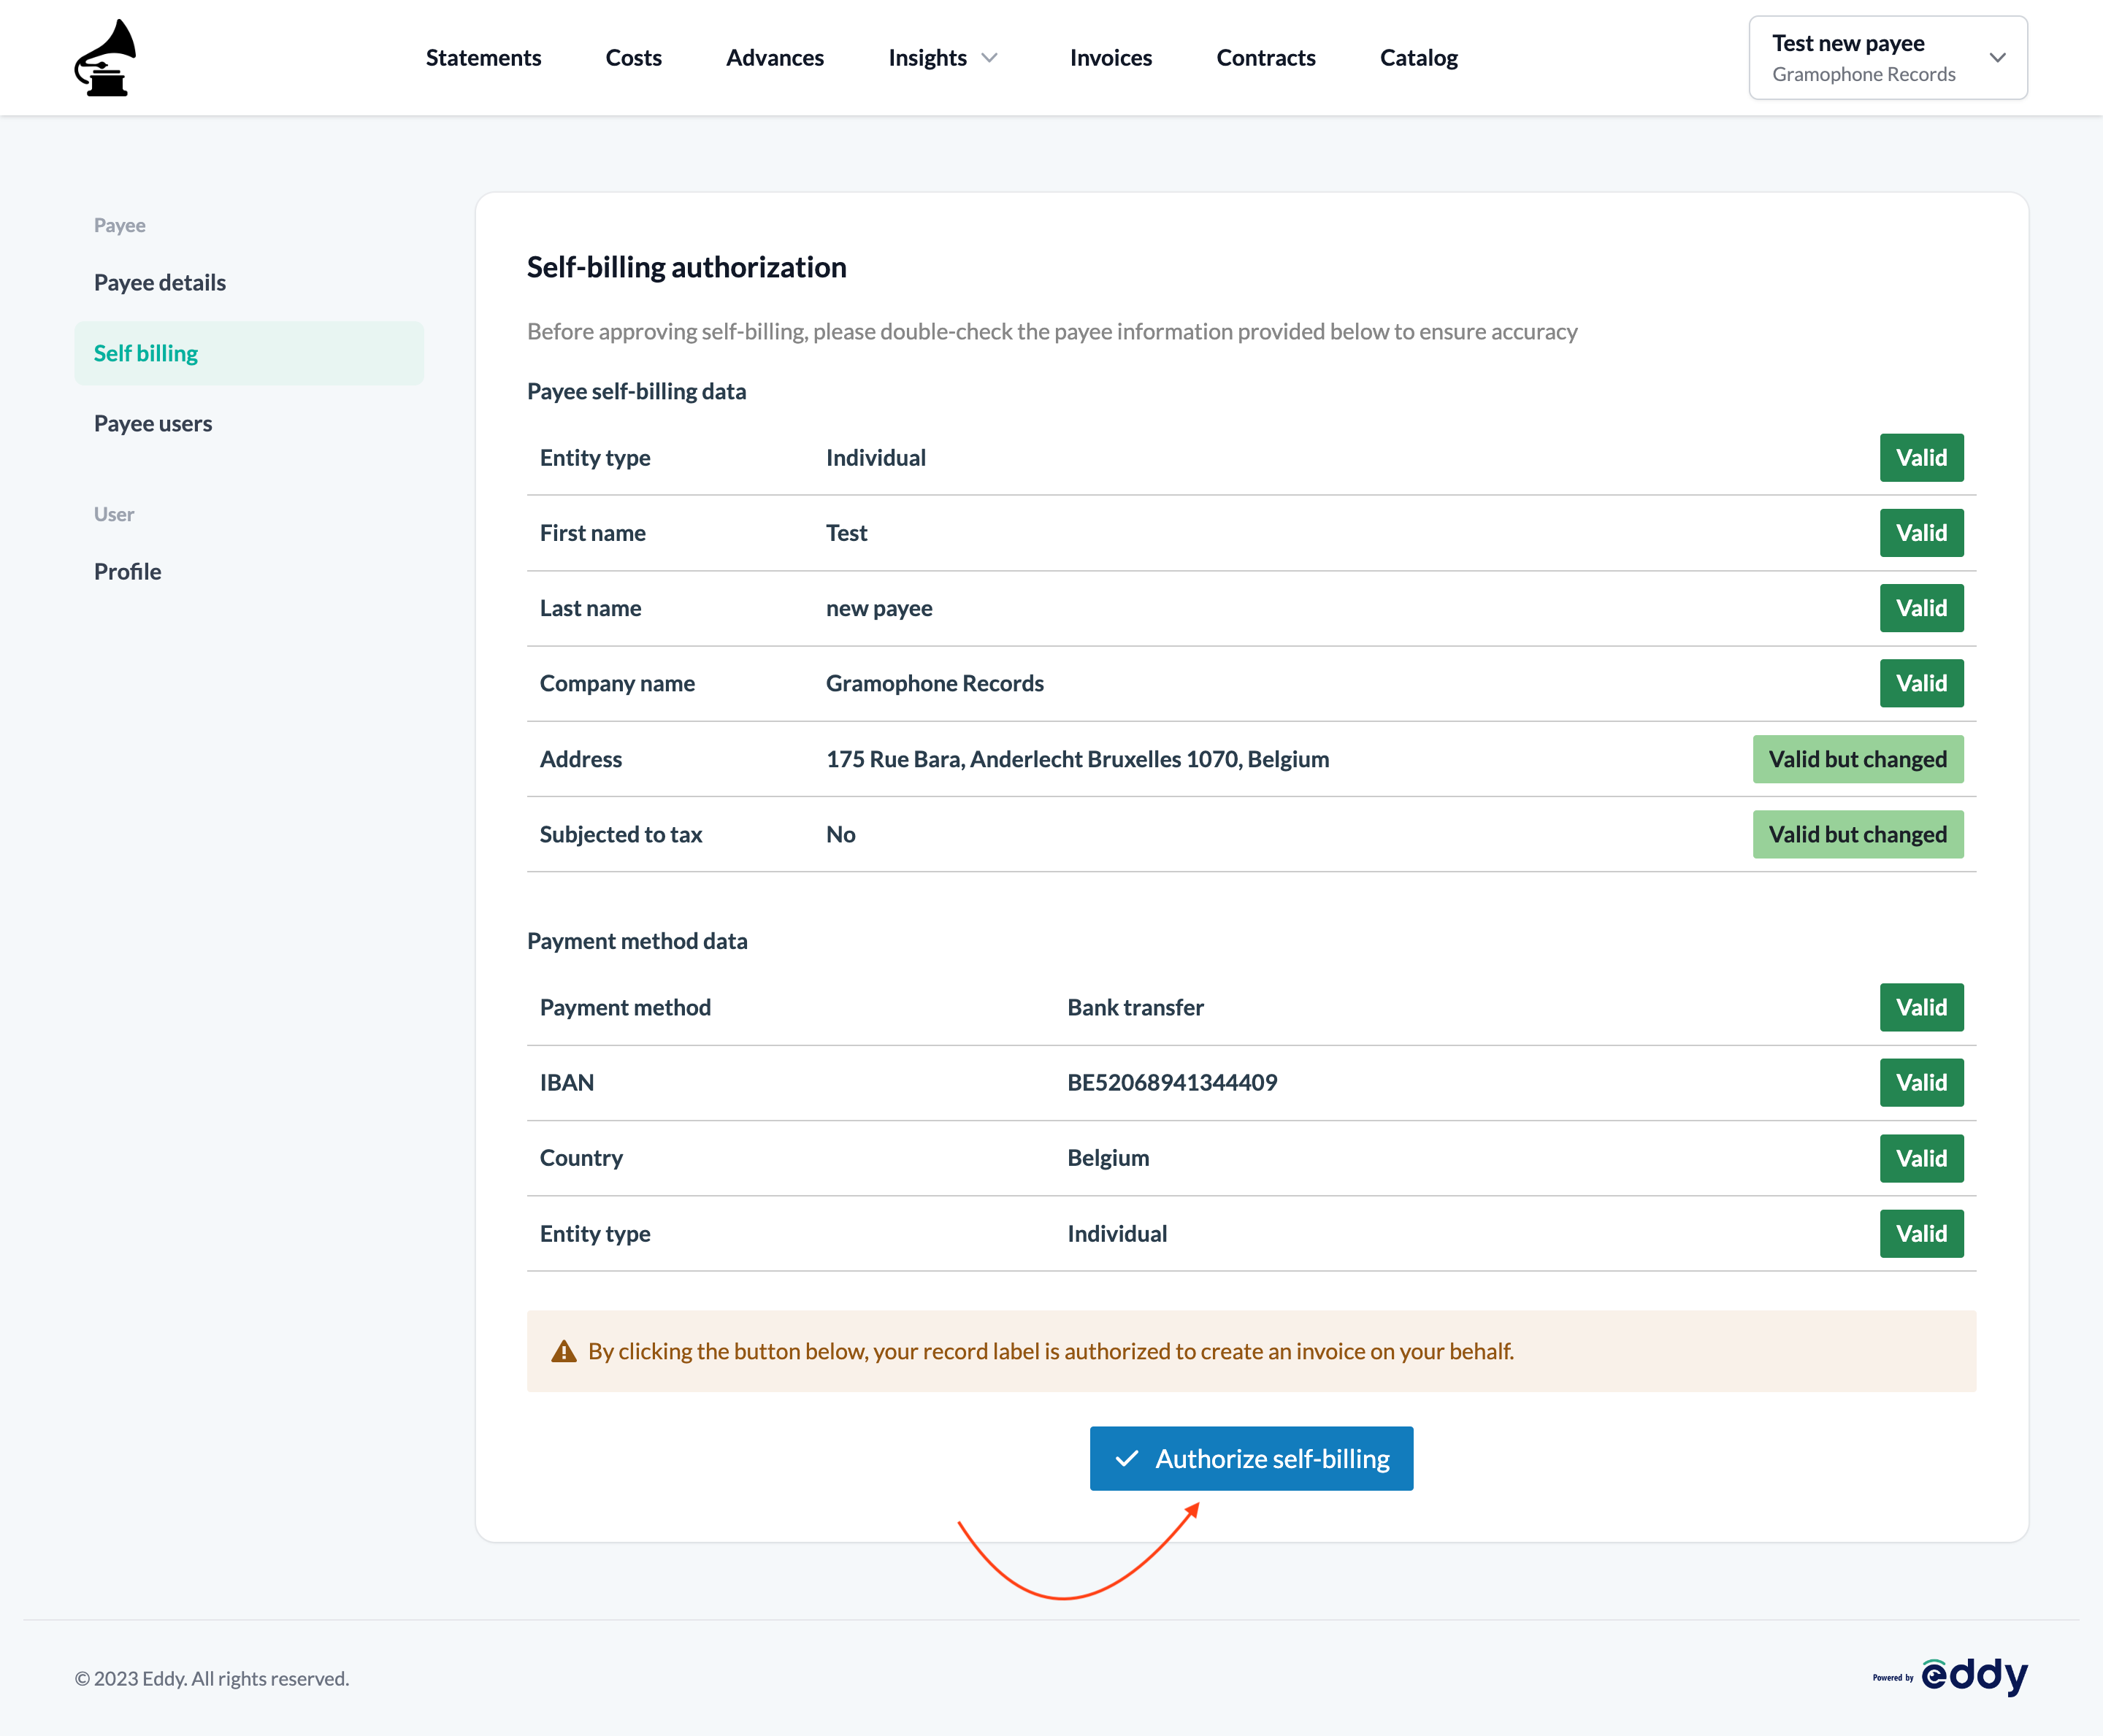
4. Self-Billing Authorization
After filling in and validating your details, authorize self-billing to complete the setup by clicking 'Authorize self-billing'.
Update Billing or Payment Details
You can edit your billing or payment details at any time. Future invoices will use the most recently updated data.
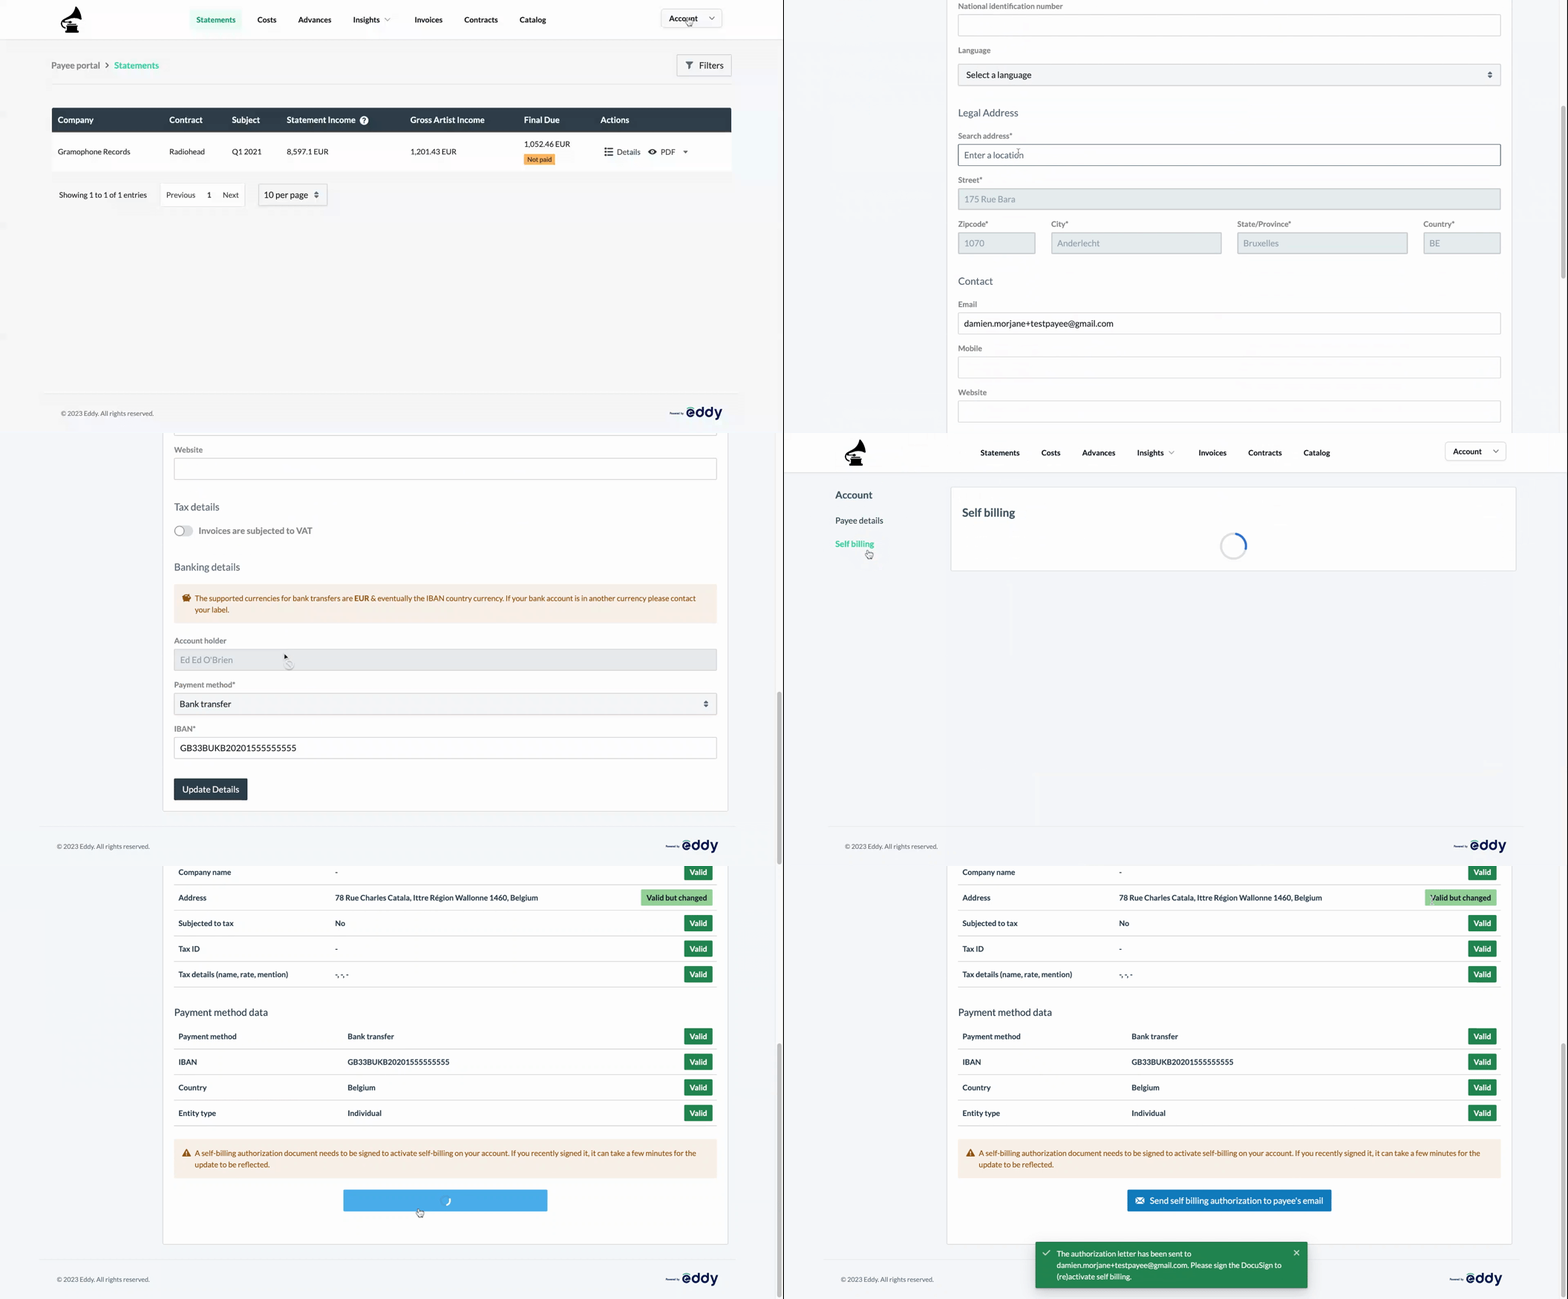
To update your details:
Navigate to Settings in the account dropdown.
Change the relevant information.
Visit the Self-Billing page to see if new authorization is needed.
If you move to another country, you'll need to upload a Tax Residence Certificate from your new country.
Voilà! Your self-billing setup is now complete, and invoices can be generated on your behalf!