Generate Invoices and Initiate Payments with Eddy's Automated System
Royalty accounting doesn't stop when a statement is generated. Getting your artists paid quickly is the part they actually notice.
With self-billing configured, eddy.app creates the documents, bundles them by payment method, and for Wise, triggers bulk payment from eddy, reconciles the statuses on its own and display them to the label and payee.
This guide covers generating documents, grouping them, and running each payout method.
📋 Before you start
Self-billing must be activated with at least one payout method, and your payees need a Complete setup status. See Self-Billing Set-up.
Step 1: Generate documents
How this works depends on the mode you chose during setup.
Automatic mode
eddy.app creates a document the moment you publish a payee's statement, provided the threshold is met and their setup is Complete. If either condition fails at publish time, nothing is created then. eddy.app catches up on its own: as soon as the payee's setup becomes Complete (for example when they authorize self-billing or you approve their Tax Residence Certificate), their already-published statements get invoiced.
Manual mode
Publishing never triggers anything. You trigger it:
Go to
Statements>Published.Click Invoice all or optionally select specific statements to invoice.
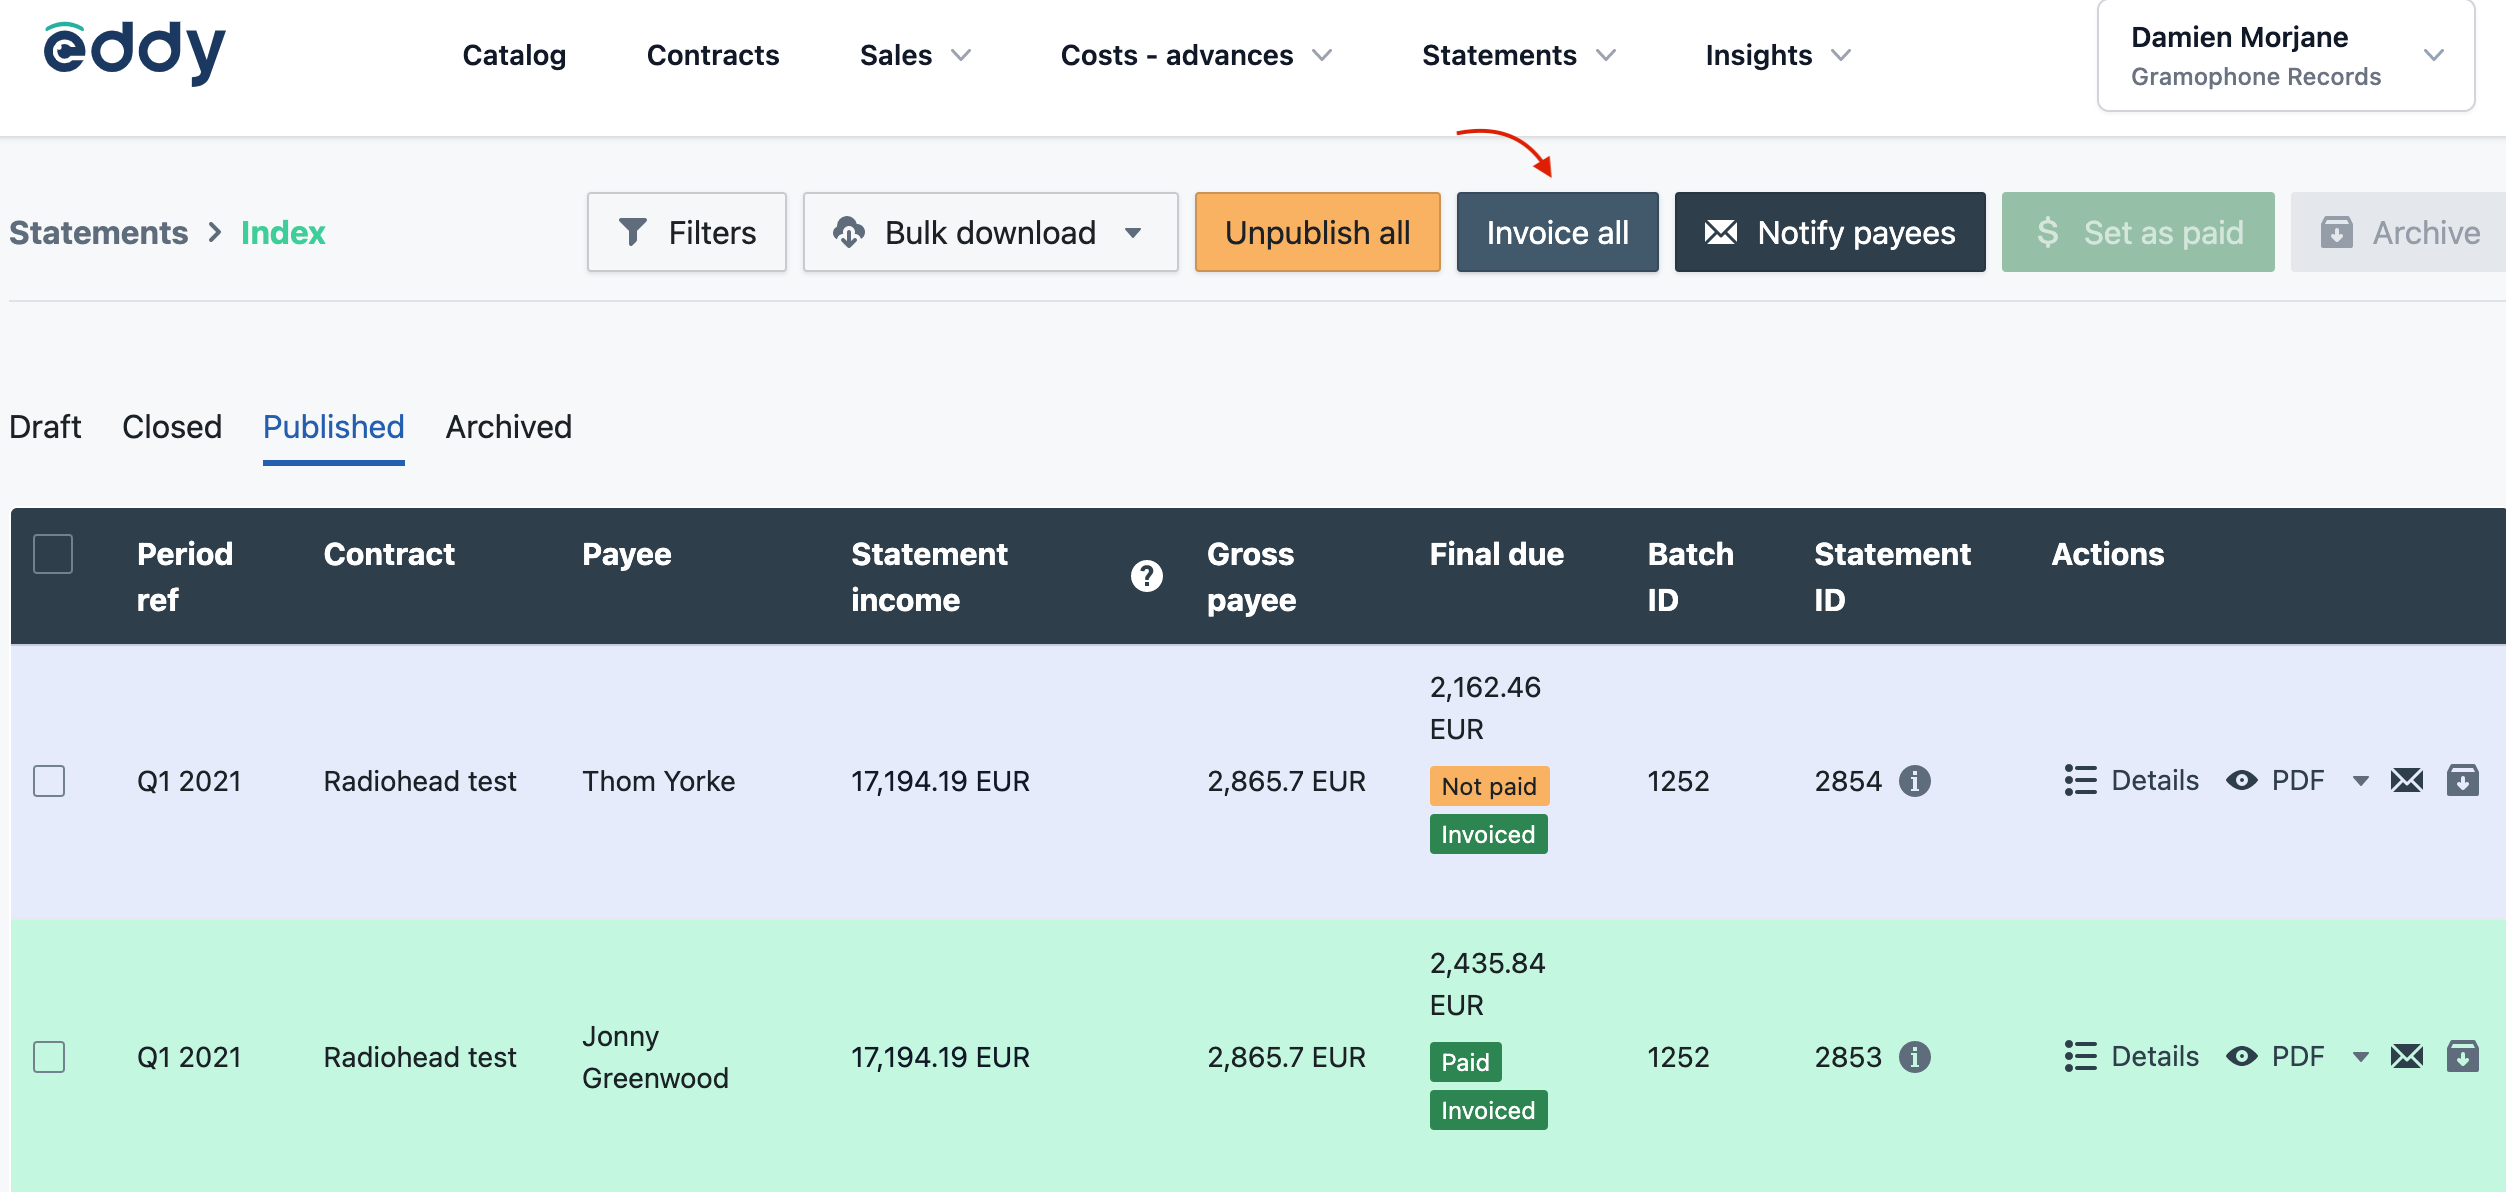
eddy.app generates documents for every un-invoiced statement that meets the conditions and skips the rest.
From the Invoices page
In either mode, you can generate for all eligible payees at once without going through the statements list:
Go to the
Invoicespage.Click Generate invoices.
This is available to your team only. Payees never see it.
Why wasn't a document generated?
Work down this list. The first two causes account for most cases.
Cause | What to do |
|---|---|
Payee setup isn't Complete | They haven't validated their details or haven't clicked Authorize self-billing. Check the |
Threshold not reached | Their combined unpaid balance is below your minimum. It generates once they cross it. |
Payment method missing or no longer accepted | Their setup shows Partially complete and new invoicing is paused. Ask them to pick a valid method. |
Tax Residence Certificate missing or in review | If you require a certificate, foreign payees can't be invoiced or paid until you approve it or continue without one. Check the payee's Tax details. See [Self-Billing Set-up](/docs/self-billing-set-up). |
Statement already marked as paid | eddy.app won't invoice a paid statement. Set it back to unpaid if that was a mistake. |
Self-billing isn't activated | Turn it on in |
Statement already invoiced | Invoice all only picks up un-invoiced statements. It never duplicates. |

On the statements list, each statement shows its invoicing status: Invoiced or Not invoiced.
Step 2: Manage your documents
Find everything under Statements > Invoices.
From here you can open PDFs, export, void and replace, manage payment status, and build payment groups.
Filter the list
Two filters, in your account and in the Payee Portal:
Document status: Pro Forma, Finalized, Voided, Replaced.
Payment status: Unpaid, Paid, No payment due.
Payee
Contract
Payout method
The PDF
A Pro Forma PDF is titled after its type, either "Pro Forma Self-billed Invoice" or "Pro Forma Debit Note". It carries a PRO FORMA watermark on every page and shows no number. Once paid, the document is finalized with its number, from the sequence for its type, and without the watermark.
Void and replace
For compliance, a finalized document has to be kept. You can't delete it.
To correct one:
Update the payee's information first.
Click Void on the document.
Click Replace to issue a corrected version.
The replacement shows up in the Payee Portal and is eligible for future payment groups.
Step 3: Initiate payouts
Generate payment groups
A payment group bundles unpaid Pro Formas by payment method so you can pay them in one go.
Click Generate payment groups. eddy.app groups them by method, Wise or PayPal.
Generating a group locks the documents in it
Payment groups are only built for payees on Wise or PayPal; self-managed and manual bank transfer are paid outside eddy.app. You can delete a group as long as payment hasn't been initiated, and that unlocks its documents again. Payment details can always be updated (unless a payment is in progress see payment statuses).
Wise
Generate a payment group.
Click Send. This creates the batch and its transfers inside your Wise account.
Once every transfer exists in Wise, a Pay button appears.
Click Pay, review the total, and confirm.
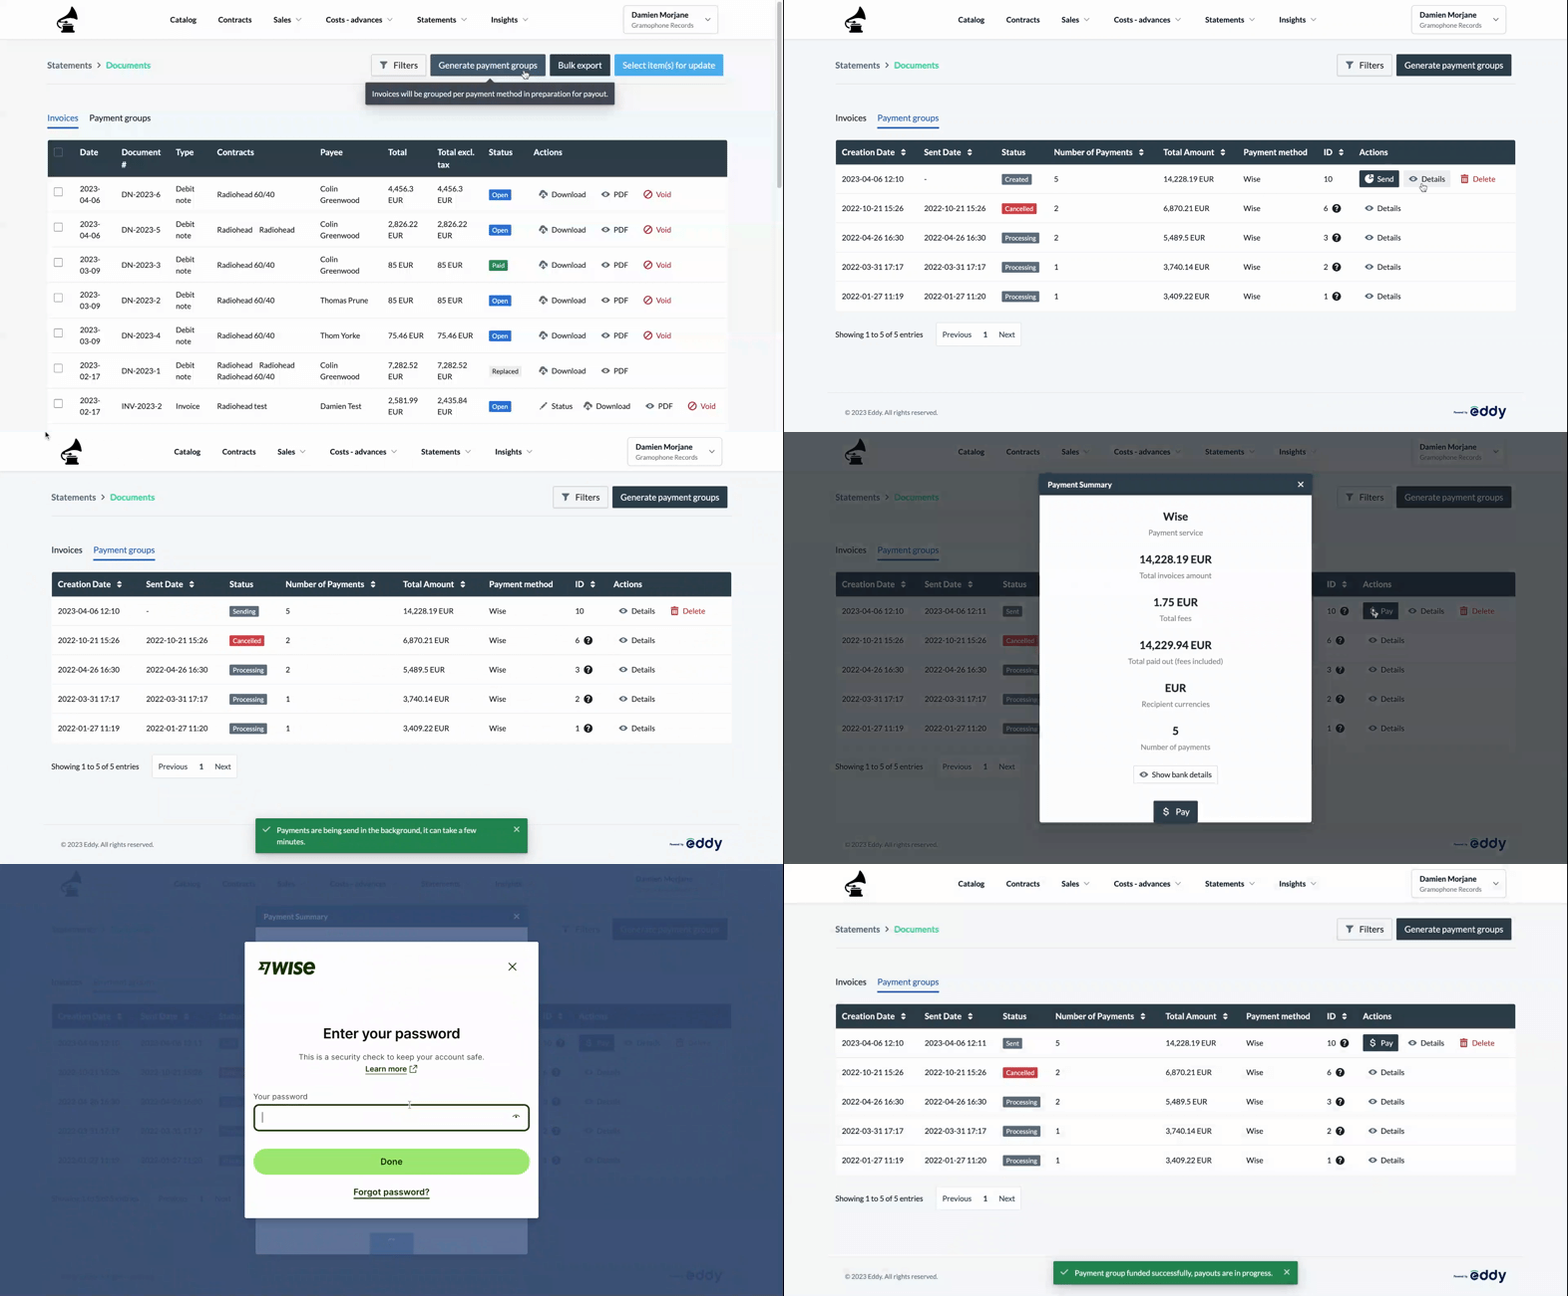
Statuses sync back automatically as the transfers progress. Each document finalizes and takes its number when its payment completes.
PayPal
PayPal payouts can't be initiated from eddy.app.
Generate a payment group.
Download the PayPal Payouts file from the
Payment Groupstab.Import it into PayPal to process the payments.
Come back and update the payment statuses in eddy.app manually.
Manual bank transfer
Pay through your own bank using the details stored in eddy.app, then:
Go to the
Invoicessection.Select the documents you've paid.
Click Update status selected and mark them paid.
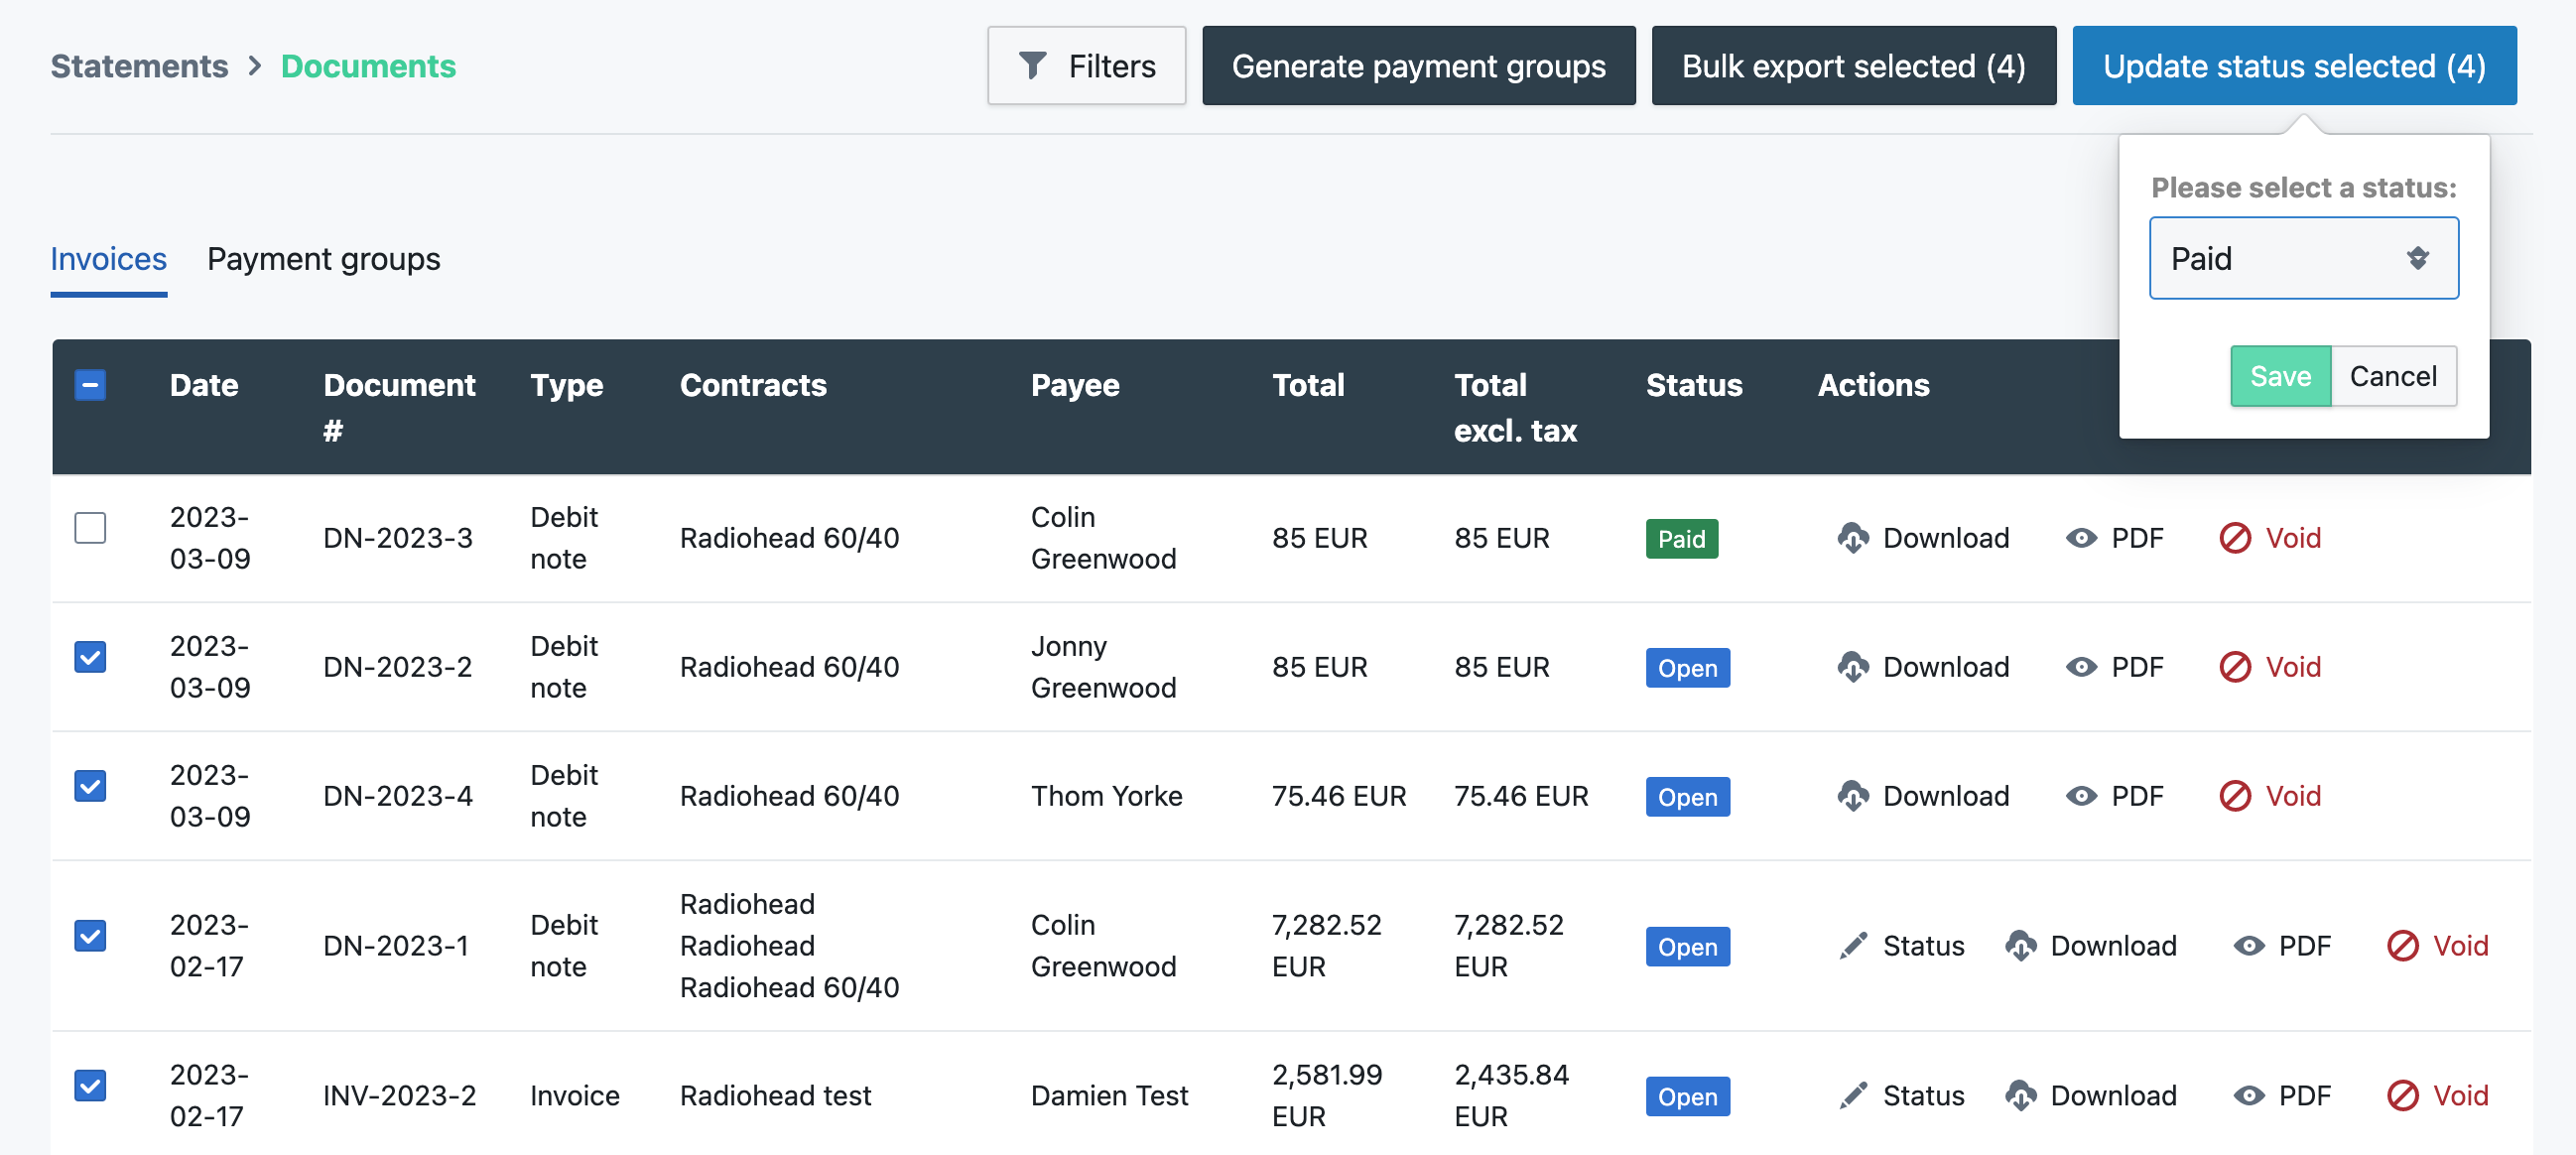
That finalizes and numbers them.
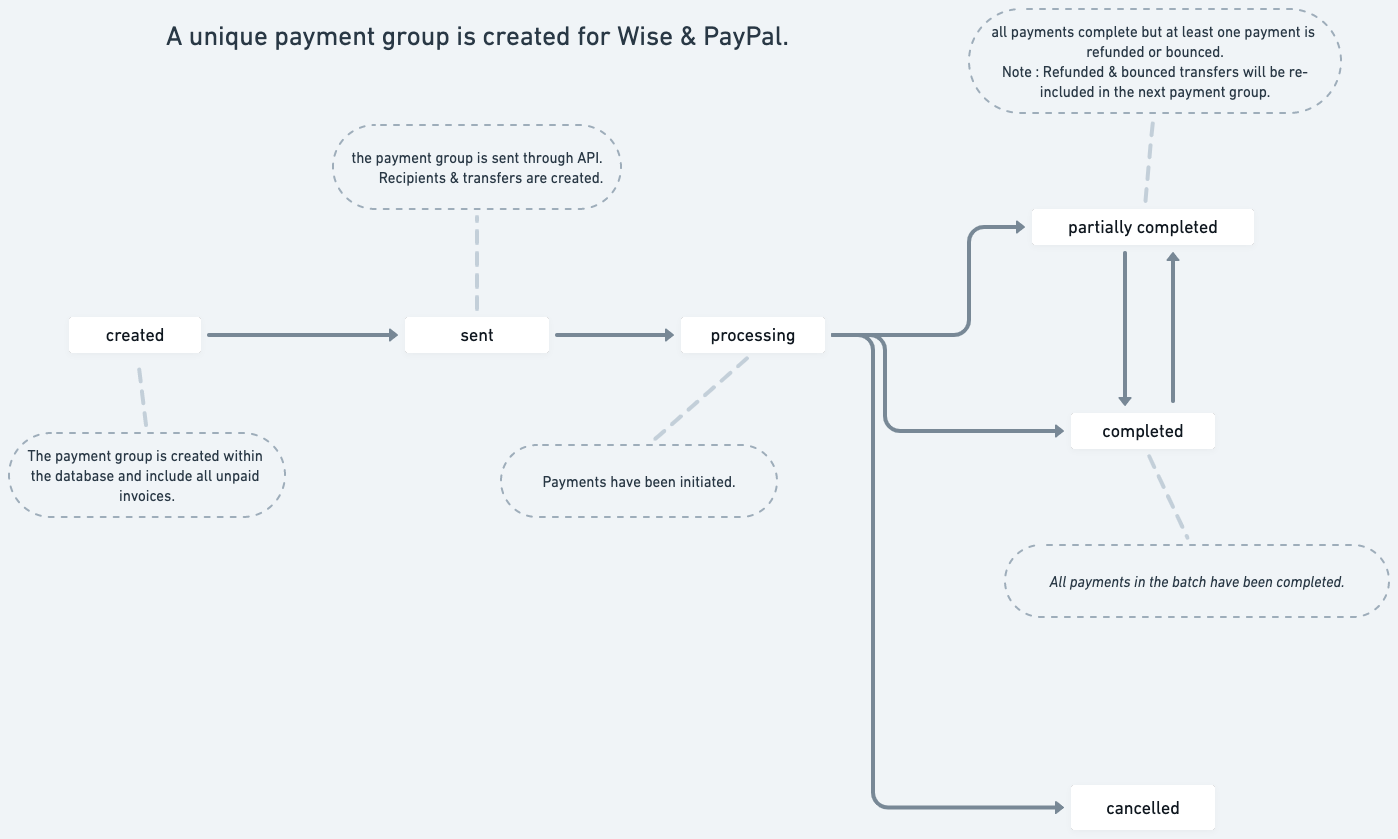
Payment group statuses
Status | Meaning |
|---|---|
Created | Group built in eddy.app. No payment initiated. |
Sent | Sent to Wise via the API; recipients and transfers created there. |
Processing | Payments initiated and outgoing. |
Partially completed | Payments completed, but some bounced back. |
Completed | All payments completed. |
Canceled | Group canceled after an error. |
When payments go wrong
A transfer couldn't be created in Wise
eddy.app cancels that transfer and retries it in your next payment group, so there's nothing to do immediately. If it keeps failing, check the payee's payment details with them, or contact Wise.
A payment bounced back
Ask the payee to update their details before you generate a new group. Retrying against the same wrong details bounces again.
The document stays finalized, and you can only correct its payment details once the transfer reaches Funds Refunded. See Document and Payment Statuses.
Insufficient funds in Wise
The payment group's funding step fails. Top up your Wise account and retry the group.