You've set up your settings, imported your catalog, and configured your contracts. Now, let's dive into importing your sales reports into the eddy.app dashboard.
Before You Begin
Check Royalty Sources: Confirm all royalty sources are included in the Settings, and create new templates if required.
Catalog Completeness: Ensure your Catalog is completely updated before importing sales. For auto-correction enabled sources, only the physical catalog needs completion.
Report Integrity: Do not alter reports. Upload them directly to prevent data errors and corruption.
How to Import Your Sales
Import Distributor Sales Reports
Navigate to the Sales import section.
Click the Import button.
Choose the correct Royalty Source Template.
Enter the Reporting Period as indicated by your distributor.
For sales in other currencies, input the conversion rate.
Press Upload and let eddy.app process the data.
Tips
Insights are only loaded once all matching errors are resolved.
Conversion rates are final and unchangeable.
Always use the correct reporting period, even for late-reported sales.
Some templates may have limited compatibility. For details, refer to our sales import file formats.
Avoid importing scoped sales exports to prevent data duplication.
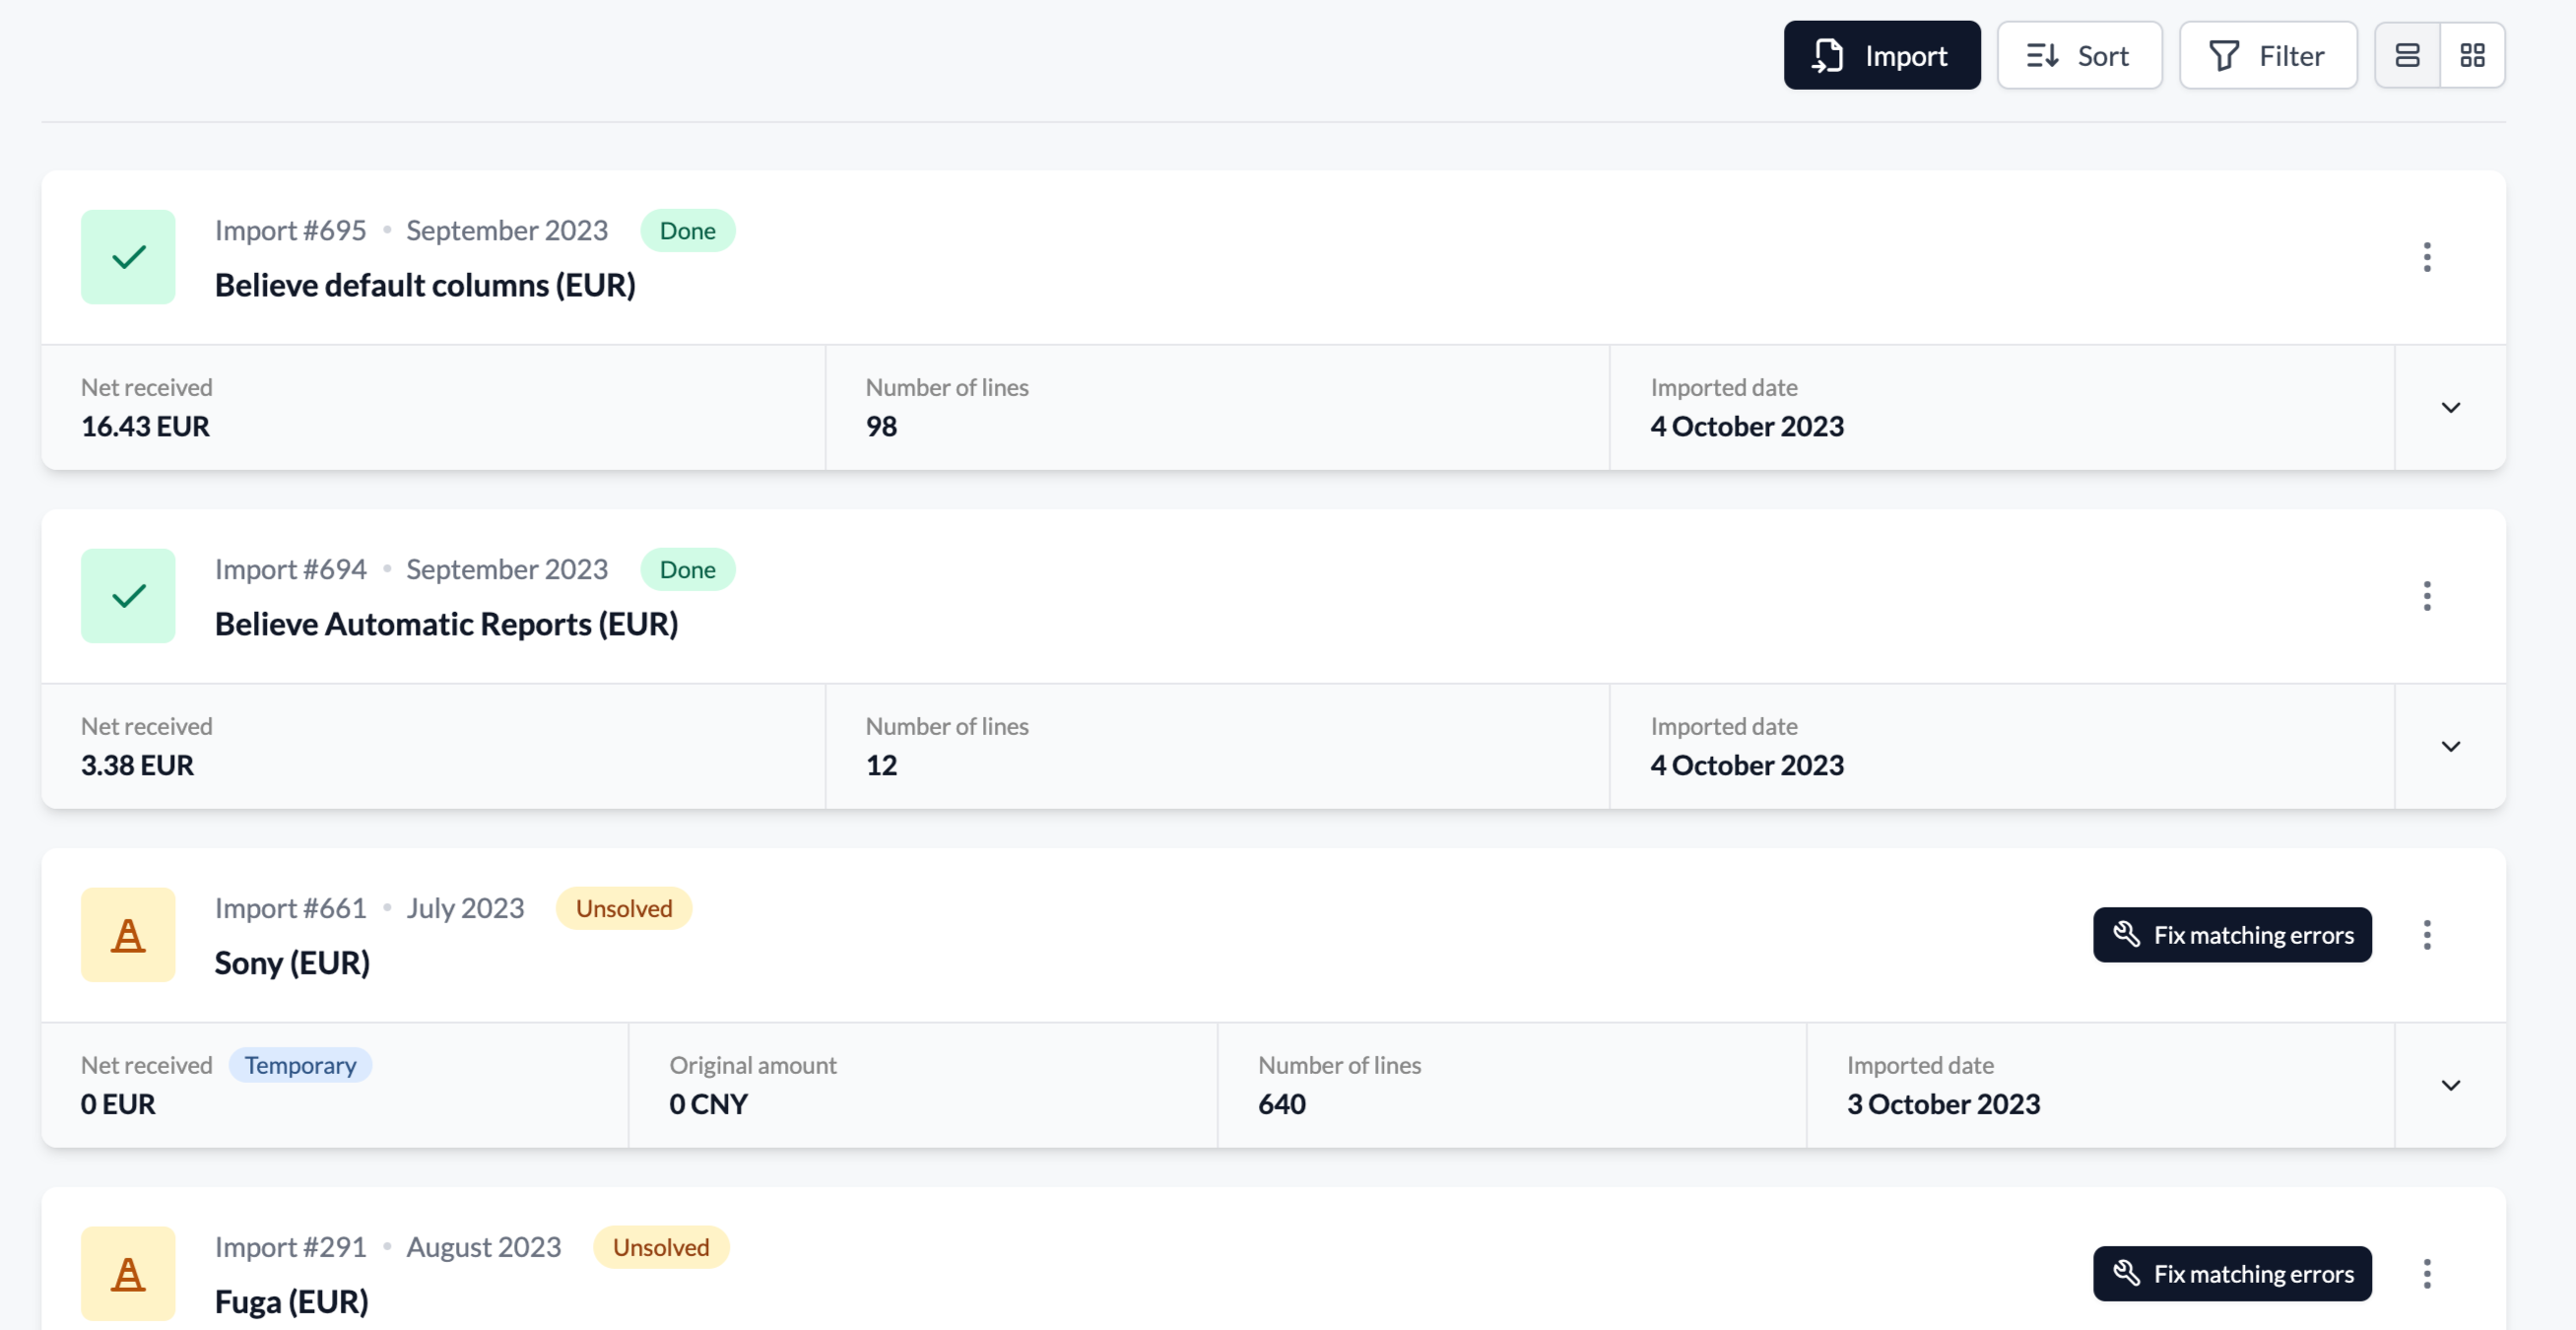
Import Phases and Statuses
Each import progresses through four statuses:
Ongoing: Import is queued or in progress.
Unsolved : Requires attention for some unprocessed sales lines; refer to matching error solutions.
Error: Import has failed. Review the error message for details.
Done: Import is complete with all sales successfully processed.
🚨Until the status is "Done", a "temporary tag" indicates the net received value is provisional.
Addressing Matching Errors
Encounter an Unsolved status? Some sales lines need manual intervention. For detailed guidance, see this article.

Filters
Filter sales by Source, Templates, IDs, Reporting Period, Import Date, Currency, and Status. The total value of your filtered imports is displayed at the bottom of the filter section.
Grid view
The grid view, also called reconciliation view, provides a visual summary of your imports for each template, showing the number of imports for the period and the total imported value for the year. This is helpful for verifying the completeness and accuracy of your uploads.
Create Sales Manually
Need to add sales without a file? Here's how:
Go to Sales and click + New sale.
Associate the sale with an item from your Catalog.
Defin the reporting period.
Enter the quantity sold and select the sales channel, country/geozone, and retailer.
Select the relevant sales channel, country or geozone and retailer.
Input the NET revenue amount at minimum.
Important reminder
If your contract uses different royalty bases, configure accordingly and add the relevant sale amount.
Advanced Features
Explore these topics in the Advanced Features folder:
Sales FTP Fetcher: Streamline sales report imports from royalty sources like Merlin Network.
Reserves : Manage physical sales reserves.
Bulk sales import: Efficiently import large volumes of sales.
Sales Import File Formats: Understand compatible formats for seamless imports.
Reserves
Set aside a portion of physical sales for potential returns. Details on reserves and releases are in our dedicated article.
🎉 You're all set! Next up: Adding Costs and Advances.